
Every mailbox on Google Workspace or Microsoft 365 costs you something every month, whether it's a real employee, a shared support inbox, or an old account you forgot to cancel. Mailcow flips that math: you pay for a server, not a seat count.
This guide walks through a real install of Mailcow on an is*hosting Premium plan, from a blank Ubuntu server to a working mail domain with webmail, spam filtering, and antivirus already wired in.
What You Need Before Setup
- A domain you control, with access to add A, MX, and TXT records
- A dedicated IPv4 with no prior mail-sending history (a previously blacklisted IP will fight you the whole way)
- A PTR (reverse DNS) record on that IP matching your mail server's hostname, requested from your host before you go live
- Docker Engine 24.0.0 or newer and Docker Compose 2.0 or newer (installed in the steps below)
- A system clock that's actually correct, since two-factor TOTP codes depend on it
Port 25 outbound works cleanly on is*hosting's Premium plan, confirmed by testing rather than assumed: a real send from this install completed a TLS handshake and got a 250 2.0.0 Ok accept from mail-tester.com's receiving server, and a second send to a Gmail address also completed the SMTP transaction end to end. Gmail's server accepted the connection and only rejected the message afterward on a content policy (missing SPF/DKIM), not a connection failure.
If you're on a different host or a lower is*hosting tier, it's still worth confirming with support before you commit, since plenty of VPS providers restrict port 25 account-wide as an anti-abuse default, but on Premium it's a non-issue.
|
Use case |
RAM |
CPU |
is*hosting plan |
|
Personal use or a small team, up to roughly 10 mailboxes |
8 GB |
4 CPU |
Premium |
|
Growing team with ActiveSync phones and heavier concurrent IMAP use |
16 GB |
6 CPU |
Elite |
Every is*hosting plan includes a dedicated IPv4 by default and weekly VPS backups, both useful here since Mailcow needs a stable public IP for DNS and mail delivery is not something you want to restore from a stale snapshot. See the VPS product page for the full plan lineup. A plan below 8 GB isn't listed because Mailcow's own minimum already sits at 6 GiB plus swap, leaving no real headroom on anything smaller.
VPS
Host your own mail server on a VPS with a dedicated IPv4 address and weekly backups included.
How to Install Mailcow on a VPS
Step 1: Point DNS and Provision the VPS
Before touching the server, add an A record for your mail hostname (for example mail.yourdomain.com) pointing at the IP is*hosting assigns you, and an MX record for your domain pointing at that same hostname. At checkout, select Ubuntu, then choose version v. 24 (Ubuntu 24.04) for the reasons covered in the FAQ below.
Step 2: Install Docker and Docker Compose
apt update && apt install -y git openssl curl gawk coreutils grep jq
curl -sSL https://get.docker.com/ | CHANNEL=stable sh
systemctl enable --now docker
Confirm both are in place:
docker --version
docker compose version
Step 3: Clone the Repository
umask 0022
cd /opt
git clone https://github.com/mailcow/mailcow-dockerized
cd mailcow-dockerized
Step 4: Generate the Configuration
./generate_config.shThe script asks three questions in order:
Detecting if your IP is listed on Spamhaus Bad ASN List...
Check completed! Your IP is clean
Press enter to confirm the detected value '[value]' where applicable or enter a custom value.
Mail server hostname (FQDN) - this is not your mail domain, but your mail servers hostname: mail.yourdomain.com
Timezone [Etc/UTC]:
Which branch of mailcow do you want to use?
Available Branches:
- master branch (stable updates) | default, recommended [1]
- nightly branch (unstable updates, testing) | not-production ready [2]
- legacy branch (supported until February 2026) | deprecated, security updates only [3]
Choose the Branch with it's number [1/2/3]
The script also runs a quick check against the Spamhaus Bad ASN List for your VPS's IP before asking anything, a small reassurance that you're not starting out on a flagged IP range. is*hosting's Premium-tier IP came back clean on this run.
is*hosting's Ubuntu 24.04 image detected Etc/UTC as the default timezone rather than a regional zone; hit Enter to accept it unless you'd rather set something local. Choose 1 for the master branch unless you have a specific reason not to. This writes mailcow.conf.
On the Premium plan's 8 GB of RAM, you won't be prompted to disable ClamAV or the search indexer; that prompt only fires below 2.5 GiB and 3.5 GiB of RAM respectively, confirmed on a live run here.
generate_config.sh also detects your IPv6 setup automatically. On this VPS it found only a link-local IPv6 address with no external connectivity and disabled IPv6 support for the mailcow stack on its own, no action needed. If your VPS has proper external IPv6, the script will configure it instead.
It then generates a temporary self-signed ("snake-oil") certificate so the stack has something to serve over HTTPS immediately. Expect a browser certificate warning on first visit until acme-mailcow finishes issuing the real Let's Encrypt certificate a minute or two after startup.
Step 5: Pull Images and Start the Stack
Mailcow's compose file pulls 18 images the first time: netfilter, postfix, postfix-tlspol, dovecot, sogo, rspamd, clamd, olefy, phpfpm, nginx, unbound, acme, watchdog, dockerapi, plus mariadb, redis, memcached, and ofelia from outside the mailcow namespace. Run the pull with the quiet flag so a non-interactive terminal doesn't fill your log with redrawn progress bars, then bring the stack up:
docker compose pull -q
docker compose up -d
On a cold Premium-tier VPS, docker compose up -d itself, meaning everything from network and volume creation through all 18 containers reporting started, took 41 seconds once the images were already pulled. If you've run this more than once on the same box while troubleshooting, prune first (docker compose down -v && docker system prune -a -f) before timing the pull again, since cached layers will report a misleadingly fast result.
Step 6: Confirm Containers and Open Ports
docker compose ps
ss -tlnp | grep -E -w '25|80|110|143|443|465|587|993|995|4190'
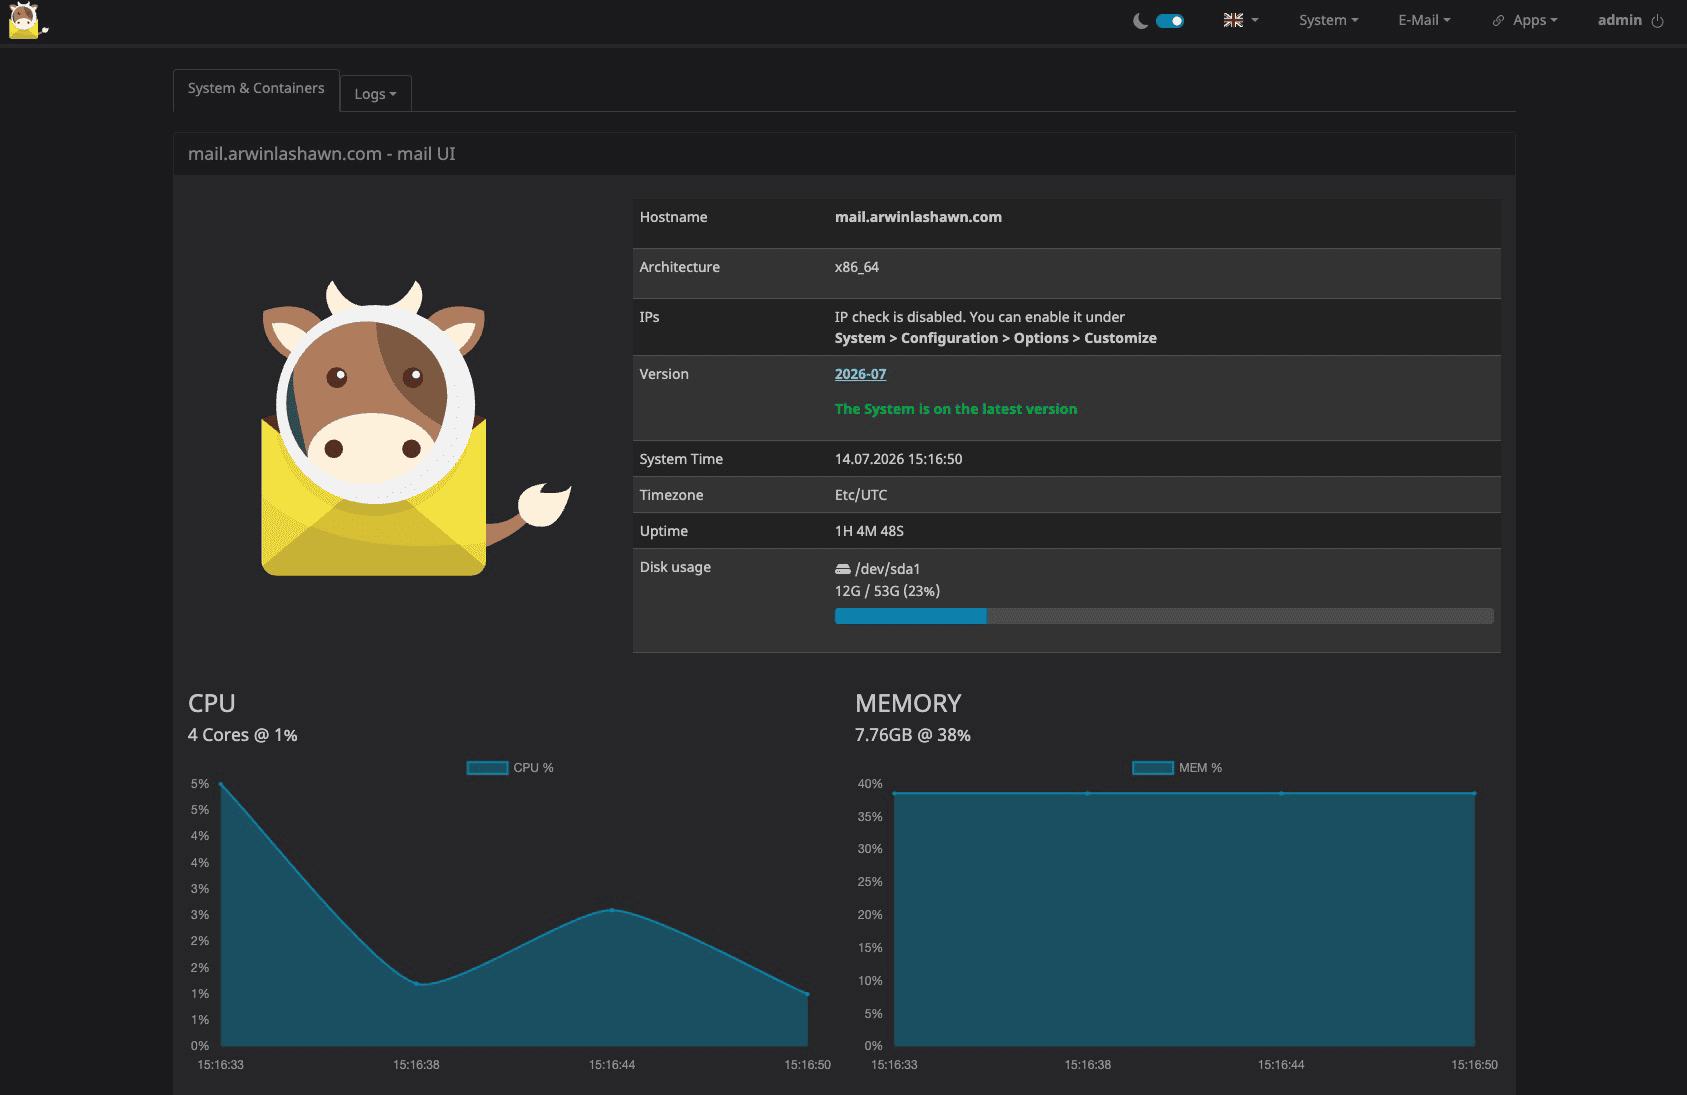
On this install, docker compose ps showed all 18 containers as Up, several with a (healthy) status once their checks passed, running Docker Compose v5.3.1 on Docker Engine 29.6.1:
NAME                                  IMAGE                                STATUS
mailcowdockerized-postfix-mailcow-1   ghcr.io/mailcow/postfix:3.10.12-1    Up (0.0.0.0:25->25/tcp, 465, 587)
mailcowdockerized-dovecot-mailcow-1   ghcr.io/mailcow/dovecot:2.3.21.1-2   Up (0.0.0.0:110,143,993,995,4190)
mailcowdockerized-sogo-mailcow-1      ghcr.io/mailcow/sogo:5.12.9-1        Up
mailcowdockerized-nginx-mailcow-1     ghcr.io/mailcow/nginx:1.30.3-1       Up (0.0.0.0:80->80/tcp, 443->443/tcp)
mailcowdockerized-rspamd-mailcow-1    ghcr.io/mailcow/rspamd:4.1.0-1       Up
mailcowdockerized-clamd-mailcow-1     ghcr.io/mailcow/clamd:1.71           Up (healthy)
mailcowdockerized-mysql-mailcow-1     mariadb:10.11                        Up (127.0.0.1:13306->3306/tcp)
mailcowdockerized-unbound-mailcow-1   ghcr.io/mailcow/unbound:1.25.1-1     Up (healthy)
ss -tlnp confirmed all ten ports (25, 80, 110, 143, 443, 465, 587, 993, 995, 4190) listening on both 0.0.0.0 and [::], each owned by a docker-proxy process rather than the container's own process directly, which is what you'd expect from Docker publishing ports through its own proxy layer rather than the host binding them itself.
Firewall: on this VPS, ufw status verbose came back inactive by default, since Ubuntu's default images from is*hosting don't ship with ufw enabled. It wouldn't have mattered if it had been active: Mailcow runs entirely inside Docker, and the docker-proxy processes confirmed above bind those ports directly, bypassing ufw's INPUT chain regardless of its state.
Mailcow's own documentation goes further and actively recommends against relying on ufw or firewalld at all to restrict its ports, since input-chain rules don't apply to a service already published by Docker. If you want to lock down which sources can reach a given port (say, restricting the admin UI to your office IP), the rule needs to go into the DOCKER-USER iptables chain instead of a ufw allow rule. ufw is still worth enabling for SSH, since that's a host-level service Docker isn't touching.
Once the containers are up, visit https://mail.yourdomain.com/admin and log in with the default credentials, username admin and password moohoo. Change this password immediately, before doing anything else.
How to Use Mailcow: Domains, Mailboxes, and Webmail
As a starting point, check this:
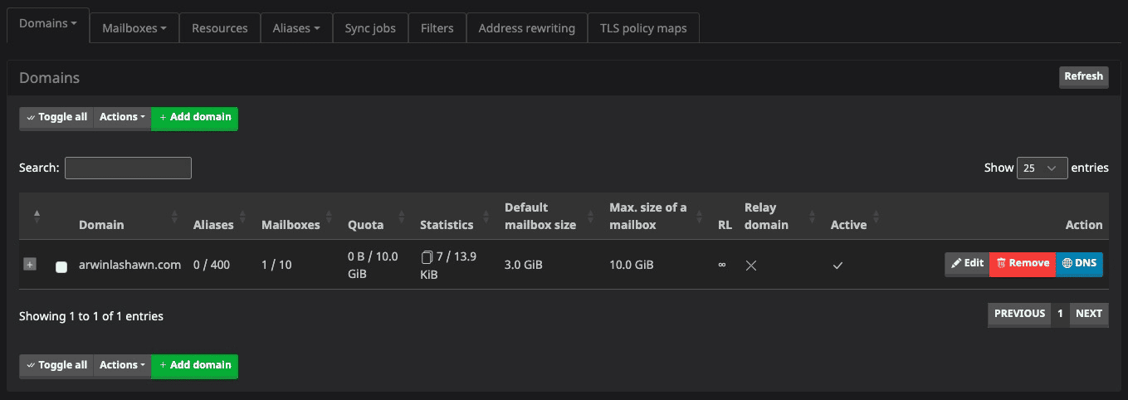
- Add your domain. From the top menu, go to E-Mail → Configuration, which lands on the Domains tab. Add your domain and click Add domain and restart SOGo, not "Add domain only": SOGo won't allow logins for mailboxes on that domain until it restarts, so do both in one step. The same form generates a DKIM key pair for the domain automatically as part of adding it (selector dkim, 2048-bit by default), so you don't need a separate step to create one.
- Create a mailbox. Under E-Mail → Configuration → Mailboxes, add a username and password. Mailcow provisions the Maildir storage and applies the domain's quota automatically.
- Log into webmail. SOGo is reachable at https://mail.yourdomain.com/SOGo or through the Apps → Webmail link in the admin panel. Log in with the full email address and mailbox password.
- DNS beyond the basics. Once the DKIM key exists, go to System → Configuration → Options → ARC/DKIM Keys to view its public value and add it as a TXT record at dkim._domainkey.yourdomain.com. One thing that catches people off guard here: a 2048-bit DKIM key runs past DNS's 255-character limit for a single TXT string, so most DNS providers, Route53 included, will reject a straight paste with a "string too long" error. Split the value into two quoted chunks placed back to back in the same record ("first 255 characters..." "the rest..."); DNS concatenates them automatically on lookup. Add a basic SPF record too, at the domain root: v=spf1 mx a -all. A DMARC TXT record at _dmarc.yourdomain.com is worth adding once SPF and DKIM are both passing; mailcow's own docs link a DMARC record generator if you want help writing the policy.
How to Update Mailcow

Mail is not something you want to lose to a bad update, so back up first:
cd /opt/mailcow-dockerized
./helper-scripts/backup_and_restore.sh backup all --delete-days 3
is*hosting includes free weekly VPS backups on every plan, but a targeted Mailcow backup restores in minutes and doesn't drag along the rest of the server's state, which matters more here than on most tools in this series given how much a mail server accumulates in its database and mailbox storage.
With a backup in hand, run the update:
./update.shThe script checks for a newer master branch commit and asks you to confirm before stopping any containers (Are you sure you want to update mailcow: dockerized? All containers will be stopped. [y/N]). It pulls new images, migrates mailcow.conf for any new options, and restarts the stack. Check docker compose ps afterward to confirm every container came back up healthy.
What You've Got Running
At the end of this, you have a complete mail server on an is*hosting Premium plan (4 CPU, 8 GB RAM, 50 GB SSD, $31.99/month): SMTP send and receive, IMAP and POP3, spam and virus filtering, and a webmail client with calendar and contacts, running across 18 containers with no per-mailbox fee attached.
The full install (system package updates, Docker install, repo clone, config generation, image pull, and container startup) ran start to finish in 9 minutes 33 seconds on a cold VPS, with docker compose up -d itself accounting for 41 seconds of that once images were pulled.
Mailcow's images and volumes added about 6.1 GB to the disk, from 4.9 GB used right after provisioning to 11 GB used with the stack running, well inside Premium's 50 GB SSD. With all 18 containers idling, RAM sat at 3.0 GB used out of 7.8 GB available, real headroom left over even at the 6 GiB-plus-swap floor Mailcow itself documents.
The server reported itself as a260984899.local, is*hosting's standard Ubuntu hostname pattern, confirming this ran on is*hosting infrastructure and not a leftover test box somewhere else. The VPS product page covers plan specifics if your mailbox count outgrows Premium, and the Linux VPS setup guide is worth a pass if this is your first time hardening a fresh server before putting anything mail-related on it.
Migration of Your Project
Change the provider without headaches. Our engineers will carry out the transfer.
Move Your Project