
Google Photos and iCloud both quietly recompress your originals once you're on a free tier, and the moment your library outgrows the storage cap, you're paying monthly for the privilege of keeping your own memories.
Immich gives you the same face recognition and AI-powered search, but the only limit is the disk you attach, and nothing gets touched behind your back.
This guide covers a real install of Immich on an is*hosting Premium VPS, running CentOS Stream 9, with the exact output from that install.
What You Need Before Setup
- Docker Engine with the Compose v2 plugin (not the standalone docker-compose binary)
- 6GB RAM minimum, 8GB recommended
- 2 CPU cores minimum, 4 recommended
- Local SSD-backed storage for the Postgres data directory, never a network share
- A dedicated public IPv4, since both the web app and mobile app connect to the server over the internet
|
Use case |
RAM |
CPU |
is*hosting plan |
|
Personal or family library, facial recognition and semantic search enabled |
8 GB |
4 CPU |
Premium VPS |
|
Multiple family accounts, large libraries, heavier concurrent ML jobs |
16 GB |
6 CPU |
Elite VPS |
Every is*hosting plan ships with a dedicated IPv4 by default, which covers Immich's requirement for public reachability without any extra configuration. All plans also carry weekly VPS backups.
One thing to plan around: Premium ($31.99/mo) ships with a 50GB SSD, leaving about 41GB free after the base install (more on the exact figure below). That's workable for testing or a modest library, but a real family photo collection will want the SSD or NVMe storage add-on, which scales from +25GB to +300GB without needing to reprovision the VPS.
VPS
Root SSH access, a dedicated IPv4 and weekly backups on every plan — with SSD or NVMe storage you can scale as your photo library grows.
At checkout, select CentOS 9 x64. Worth knowing before you start: that label doesn't match what the OS itself reports. cat /etc/os-release returns PRETTY_NAME="CentOS Stream 9", since CentOS Linux 9 doesn't exist as a release anymore and Stream is what feeds RHEL now. Functionally the same as the checkout implies, just don't be surprised by the string.
How to Install Immich on a VPS

Step 1: Install Docker
is*hosting VPS plans don't ship with Docker pre-installed. Root SSH access is included on all plans, so no sudo is needed anywhere in this guide.
curl -fsSL https://get.docker.com | sh
systemctl enable --now docker
Worth checking before moving on: firewalld on this image is installed but inactive by default, confirmed with systemctl status firewalld before Docker ever touches the system. That's different from some CentOS 9 tutorials where Docker's install script disables an already-running firewalld. Here there was nothing running to disable, but the practical result is the same either way: nothing blocks Docker's own port publishing.
Step 2: Download and configure the compose files
mkdir /root/immich-app && cd /root/immich-app
wget -O docker-compose.yml https://github.com/immich-app/immich/releases/latest/download/docker-compose.yml
wget -O .env https://github.com/immich-app/immich/releases/latest/download/example.env
The default .env ships with a placeholder database password and a commented-out timezone. Neither nano nor any interactive editor is available on a minimal CentOS 9 install (rpm -q nano returns "package nano is not installed"), so both get set with sed:
sed -i "s/DB_PASSWORD=postgres/DB_PASSWORD=$(openssl rand -hex 12)/" .env
sed -i "s/^# TZ=Etc\/UTC/TZ=Asia\/Kuala_Lumpur/" .env
Step 3: Start the stack
docker compose up -dOn this Premium VPS, a cold pull of all four images (including the machine learning container, which bundles its own model weights) to fully healthy containers took 1 minute 5 seconds, timestamped start to finish. docker compose ps afterward showed every container reporting (healthy):
CONTAINER ID   IMAGE                                                            STATUS                    PORTS
be44ee25f6db   ghcr.io/immich-app/immich-server:v3                              Up 45 seconds (healthy)   0.0.0.0:2283->2283/tcp, [::]:2283->2283/tcp
14704462736a   ghcr.io/immich-app/postgres:14-vectorchord0.4.3-pgvectors0.2.0   Up 46 seconds (healthy)   5432/tcp
98d97c462d7d   ghcr.io/immich-app/immich-machine-learning:v3                    Up 46 seconds (healthy)
43a943403075   valkey/valkey:9                                                  Up 46 seconds (healthy)   6379/tcp
Firewall
Immich runs entirely inside Docker, with no services installed directly on the host. That means Docker's own iptables rules control public access, not firewalld. ss -tlnp after startup confirms exactly one port reachable from outside: 2283, bound on both IPv4 and IPv6 via docker-proxy. Postgres (5432) and Redis (6379) never leave the container network. There's no firewalld re-enable step needed here, since that only applies when a non-Docker service also needs a port opened alongside Docker's own.
How to Use Immich: Registration and First Upload
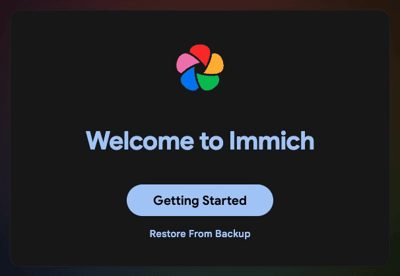
Visiting http://<your-vps-ip>:2283 for the first time shows a welcome screen with two options: Getting Started or Restore From Backup.
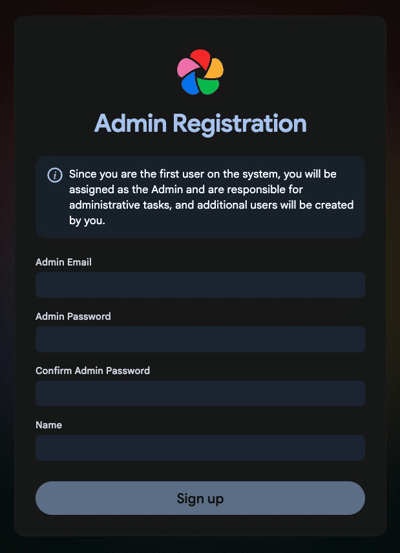
Getting Started leads to the Admin Registration form. Immich makes the first account created the admin automatically, with a note explaining that additional users get created by that admin afterward.
After signing up, a multi-step onboarding wizard walks through instance-wide settings: theme (light or dark), language, then two privacy screens worth pausing on.
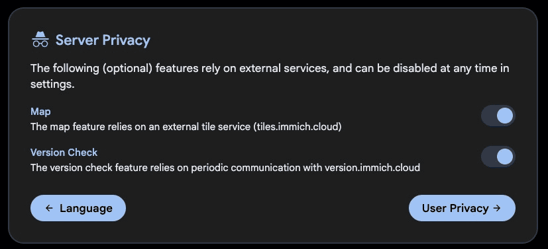
Server Privacy shows that two optional features are enabled by default and reach out to external services: the Map feature pulls tiles from tiles.immich.cloud, and Version Check pings version.immich.cloud periodically. Neither is required for the app to function, and both toggle off in this same screen.
The next step, User Privacy, covers Google Cast, which is already off by default since it loads resources from Google to work. Anyone treating self-hosting as a genuine privacy boundary should flip Map and Version Check off here rather than digging through settings later.
The wizard also passes through Storage Template, an optional file auto-organization engine that's off by default, and a Backups screen where Immich recommends a 3-2-1 backup strategy directly in the UI: three total copies of your data, two on different local devices, and one offsite. is*hosting's weekly VPS backup satisfies the offsite piece, and the targeted Postgres backup covered later in this guide handles the local copy. The final step offers the mobile app, either through the App Stores or an Obtainium Configurator link for sideloading on Android.
Once through onboarding, the main Photos view is empty and prompts you to upload your first image. The sidebar also shows live storage usage and the running server version at a glance.
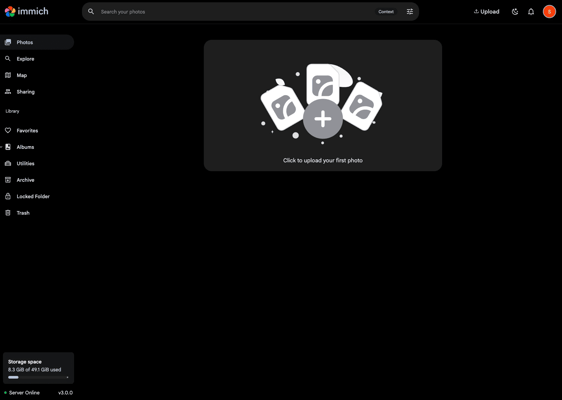
Two features worth trying immediately after your first upload: the search bar accepts natural-language queries against CLIP embeddings (searching "beach" finds beach photos with no manual tagging), and the Explore tab surfaces faces automatically clustered, ready to be labeled with names.
How to Update Immich
is*hosting includes free weekly VPS backups on every plan, which covers a full-disk disaster scenario, but restoring from one means rolling the entire VPS back when only the Immich data actually changed. For routine updates, a targeted backup of the Postgres volume alone restores far faster:
docker exec immich_postgres pg_dumpall -U postgres | gzip > /root/immich-backup-$(date +%F).sql.gzThen update:
cd /root/immich-app
docker compose pull
docker compose up -d
The default .env pins IMMICH_VERSION to a specific release tag rather than tracking a rolling release tag (this install came down as v3), so upgrades only happen when you deliberately bump that value and pull again. That's worth keeping in mind if you're used to tools that auto-update on every restart.
What You've Got Running
This install landed on Premium (4 CPU, 8GB RAM, 50GB SSD, $31.99/mo) in under 2 minutes from a cold image pull to four healthy containers, with a single port (2283) reachable from outside. Base disk usage sat at 8.3 GiB of 49.1 GiB available, leaving roughly 41GB for an actual photo library before the SSD add-on becomes worth adding. From here, the mobile app connects to the same server for automatic camera-roll backup, and every photo it stores stays at its original resolution for as long as the disk holds it.
For the VPS itself, see the is*hosting VPS lineup. If this is your first Linux VPS, the general Linux VPS setup guide covers the basics this article assumes.