Does owning your own mail server sound too complicated to you or like "for someone else, but not for me"? Setting up a mail server can indeed take some time, but it is a process that many people have gone through and it offers more advantages than disadvantages.
What is a mail server?
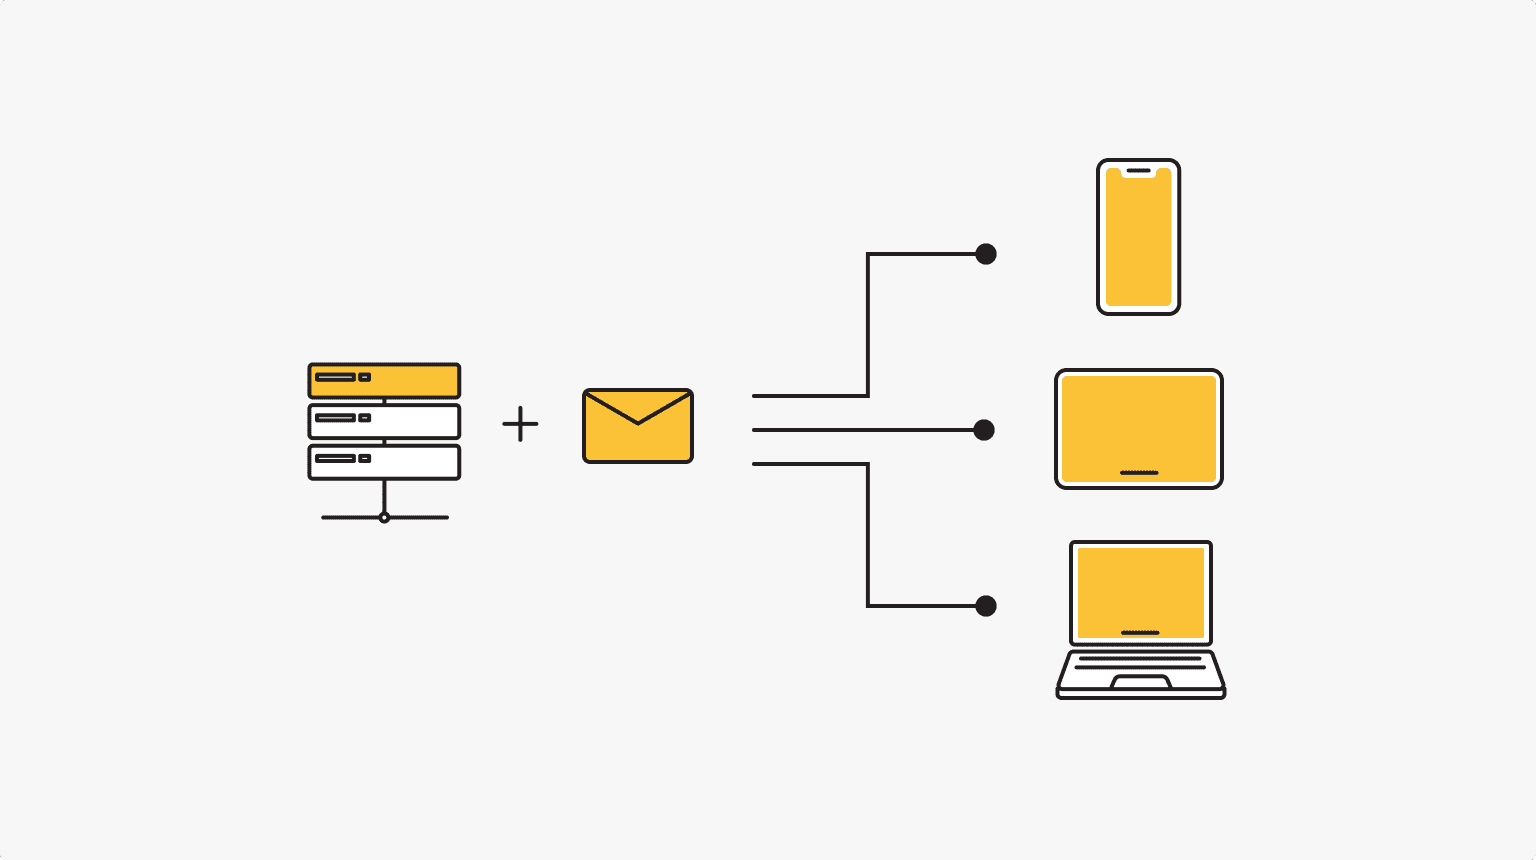
A mail server is a program for exchanging mail. Everyone who has an email account uses mail servers, whether it’s free Google and Yahoo or other services. However, when it comes to running a business project, free services may not be the right solution for some purposes.
Large and growing projects face the need of having more control over correspondence: the more clients there are, the more important it is to ensure constant delivery of emails. Moreover, security becomes another criterion. In such cases, you should think seriously about your own mail server.
Protocols for server operation
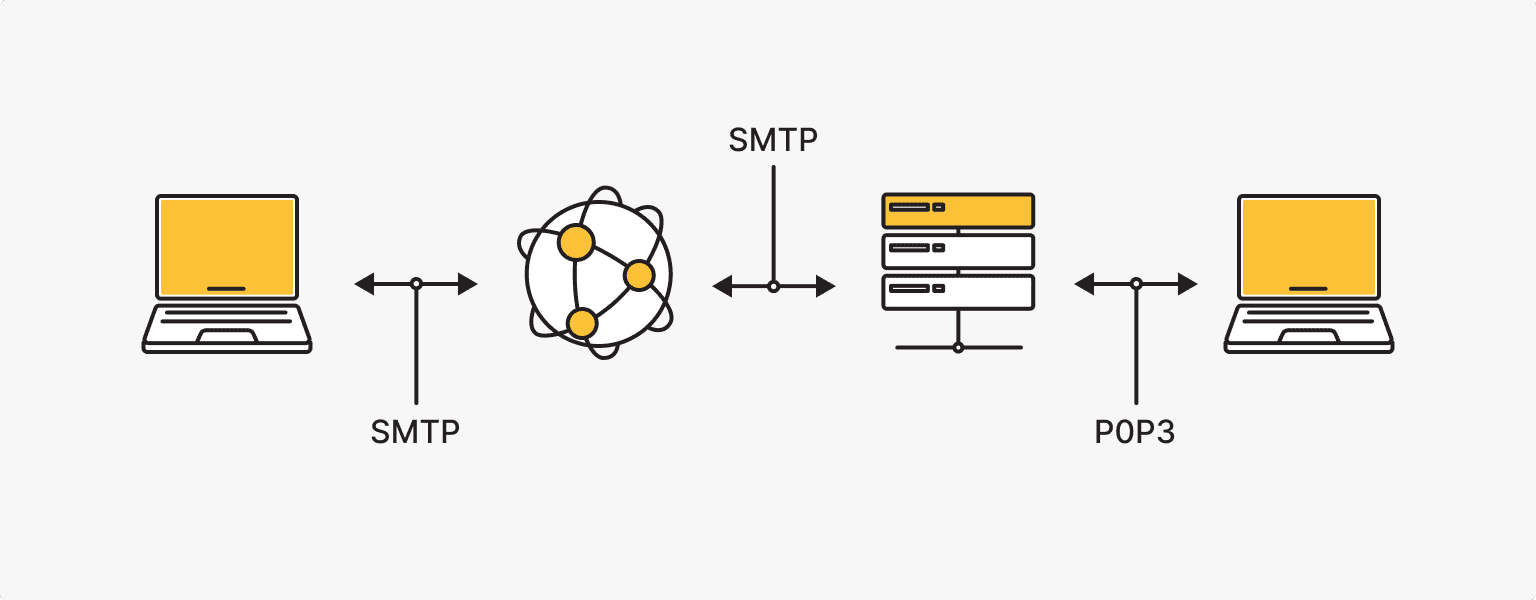
The following protocols are involved in the operation of the mail server:
- SMTP
Simple Mail Transfer Protocol is a simple communication protocol for sending emails. The main task of SMTP is relaying between a sender and a receiver (checking configuration, sending emails, receiving reply code). Ports 25, 587, and 465 (for SSL connection) are used for its operation. Details about SMTP server operation can be found here.
- POP3
Post Office Protocol is a protocol for receiving emails. POP3 establishes a connection to a server and downloads the email to the recipient's device to display it in an email client. Ports 110 (unencrypted) and 995 (SSL/TLS) are used for its operation.
- IMAP
Internet Message Access Protocol is another protocol for receiving emails. The main difference from POP3 is that IMAP allows you to work with mail directly on the server, without duplicating it on the local device. Ports 143 (without encryption) and 993 ( SSL/TLS) are used for its operation.
Pros and cons of the own mail server
Benefits of having personal mail server:
- Privacy. When you set up your mail server, you know that you are the only user. The disadvantage of free services may be that they analyze your mail to provide relevant ads or search results.
- Security. By owning your own server, you are responsible for security. Working on a shared server, you never know what security policies might be violated.
- Reliability. You do not have to worry about other users spamming this server, which could undermine your work.
- Full control. Your server, your rules. On your mail server you can set up a spam filter, limits on attachments, install special software, etc.
The disadvantages are the high responsibility for the email server performance, as well as the time, money, and effort to create it. You will need to support a security system due to hacker activity and other problems that may appear.
What will you need to create your own email server?
So, to create your own email server, you will need:
- A domain name. If you don't already have one, get it, as your email address depends on it (domain - ishosting.com, mail - [email protected]).
- A server (or a separate computer). This can be either a VPS or a dedicated server. It will store all your emails. Just be sure to choose a suitable configuration beforehand. If you are planning to work with a large amount of emails, you should choose a server with enough disk space.
- Email sorting and routing software and a spam filter (e.g. SpamAssassin).
And, of course, you will need a stable and fast Internet connection.
Minimum server configuration requirements:
- 1GHz processor
- 1GB+ RAM
- 5GB+ disk space
VPS
Virtual private servers - efficient operation at a favorable price. Fast NVMe, 22 countries, managed and unmanaged VPS.
How to host your own email server
There are several ways to build your own mail server, so we'll look at the three easiest of them.
Run your own email server with personal server and control panel
Get a domain and your own server (for mydomain, VPS, dedicated or cloud server) with a control panel and log in with a login and password to work with the server. You need to add a mail domain through the ispmanager server control panel and then create a mailbox.
You can add (create) a mail domain in the control panel under Domains - Mail Domains. Click Add and in the window that appears, fill in all the fields, and then click OK.
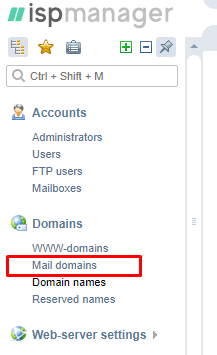
Name - the domain name.
Owner - the name of the user who owns the new mail domain.
Default action - what should be done with mails that will be sent to non-existent addresses in the created mail domain (report an error, ignore and delete, redirect to address or redirect to domain).
The next step is to create a mailbox. Go to Accounts - Mailboxes and click New. To create a mailbox on behalf of another user, go to Mail - Mailboxes and click Create. Fill in all the fields and click OK.
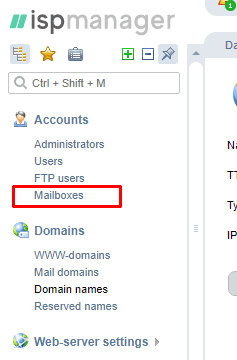
Name - the mailbox name, placed before the @ sign. Latin letters, numbers, dashes, underscores, and periods are allowed.
Domain - the domain to which the mailbox belongs, placed after the @ sign.
Alias - additional names for the mailbox. For example, your mailbox is [email protected]. The aliases are info, mail, and support. All mails sent to [email protected], [email protected], and [email protected] will automatically go to [email protected]. Aliases are spaced (info mail support info-center) and work within one domain.
Send copies to email - in this field, specify one or more email addresses for copies of all correspondence, if necessary.
Max.size - the maximum size of the mailbox to be created.
Note - additional information.
Use any mail client (e.g. Thunderbird, Outlook, eM Client, etc.) to conveniently work with your mailbox.
Create email server with a separate computer and hMailServer
If you do not want to rent a separate server and are confident in the capabilities of your computer (more specifically, its disk space), you can create the mail server as follows.
Don't forget to buy a domain name!
Use the free hMailServer application for Windows. Download the latest version of the software and follow the installation instructions:
- Run the downloaded hMailServer file.
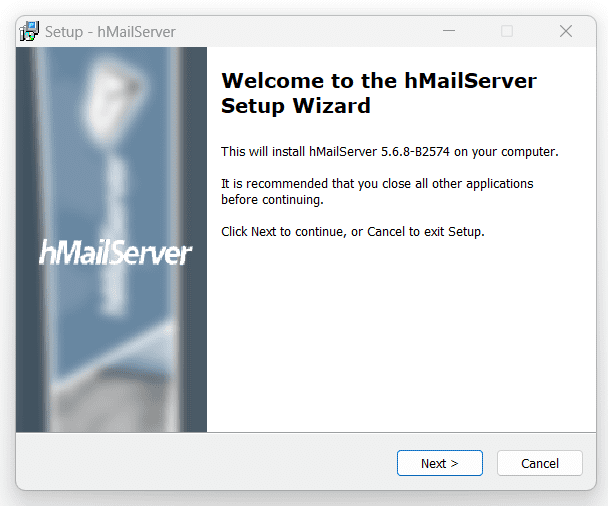
- A welcome screen will appear to install the program. Click Next. Then review the license agreement and click "I accept the agreement".
- Then choose where you want to install hMailServer. We recommend installing the application on the C: drive.
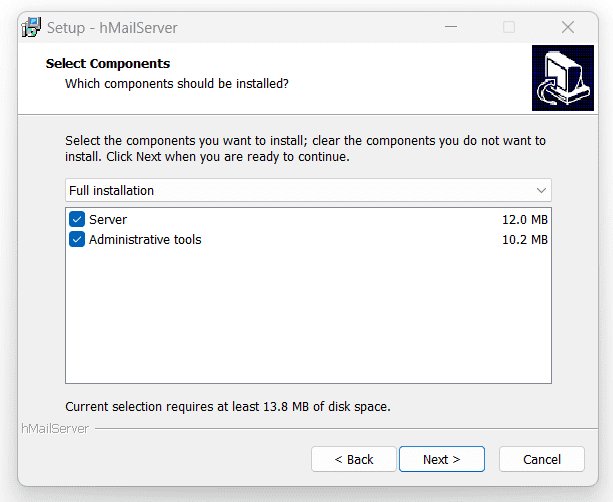
- On the component selection screen, select "Full Installation" from the drop-down menu and click Next.
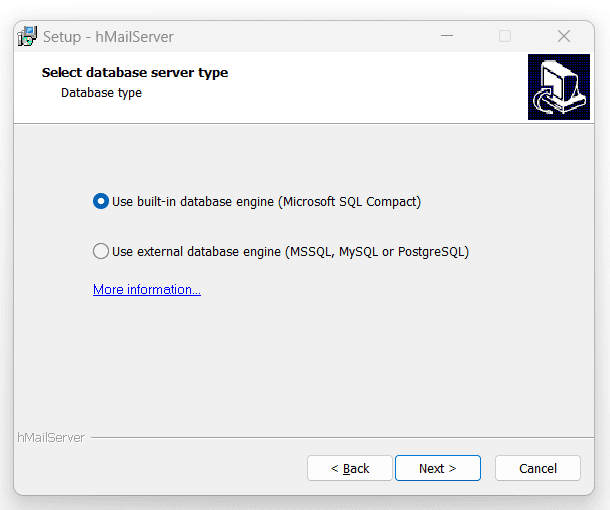
- The next step is to select the database you want to use. You can select "Use built-in database engine" and then click Next.
- If necessary, agree to create a start menu shortcut.
- Then you will be prompted to create a password for your mail server. Make sure that the password is secure.
- Click Install. Once the installation is complete, make sure the Run hMailServer Administrator checkbox is selected and click Finish.

Now let's set up the mail server:
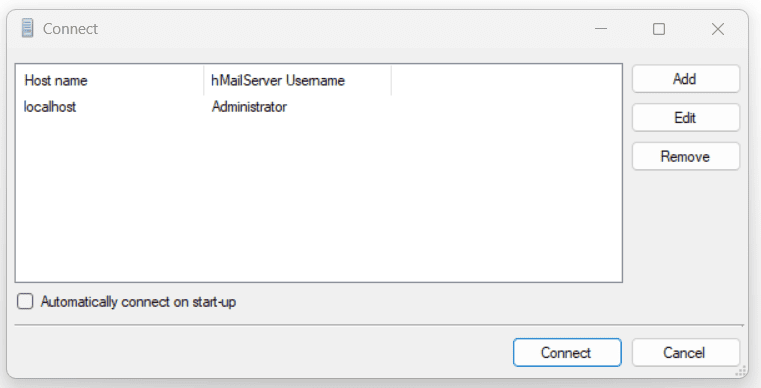
- Open hMailServer Administrator and click on Connect. Then enter the password you created during the software installation.
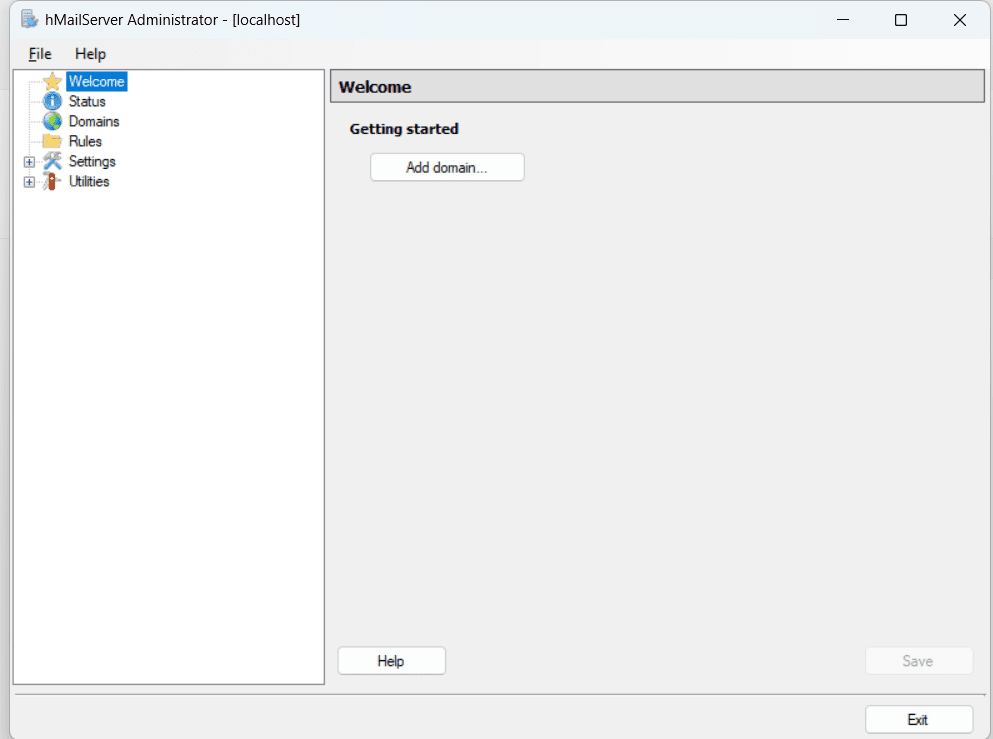
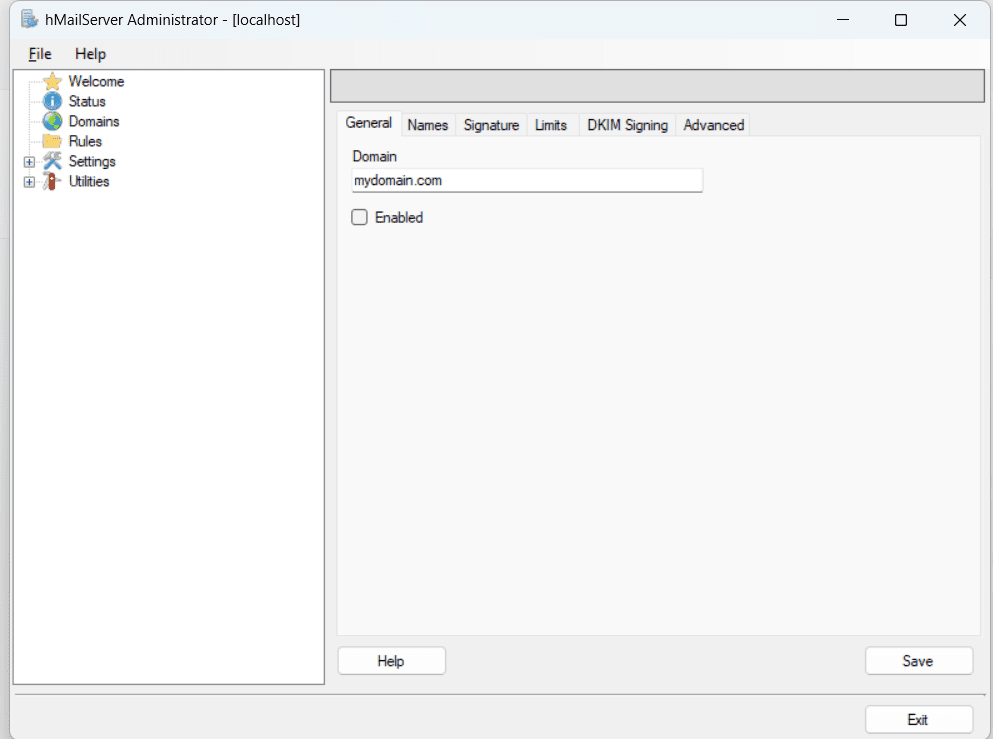
- Under Getting Started, click Add Domain and enter the domain name in the Domain field (the domain is used after the @ sign). Make sure the Enabled checkbox is inactive, and then click the Save button.
- Use the navigation bar to go to Domains and then click on the domain name you just entered. Click on the Accounts.
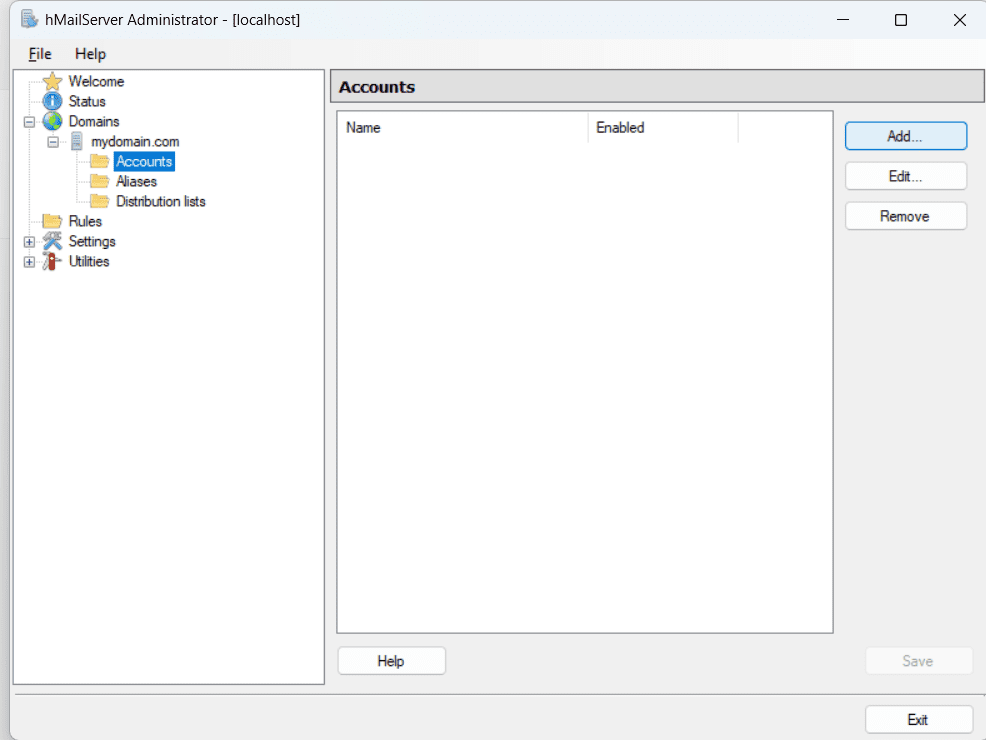
- Under Accounts, click Add. In the window that opens, enter a mailbox name in the Address field (used before the @ sign).
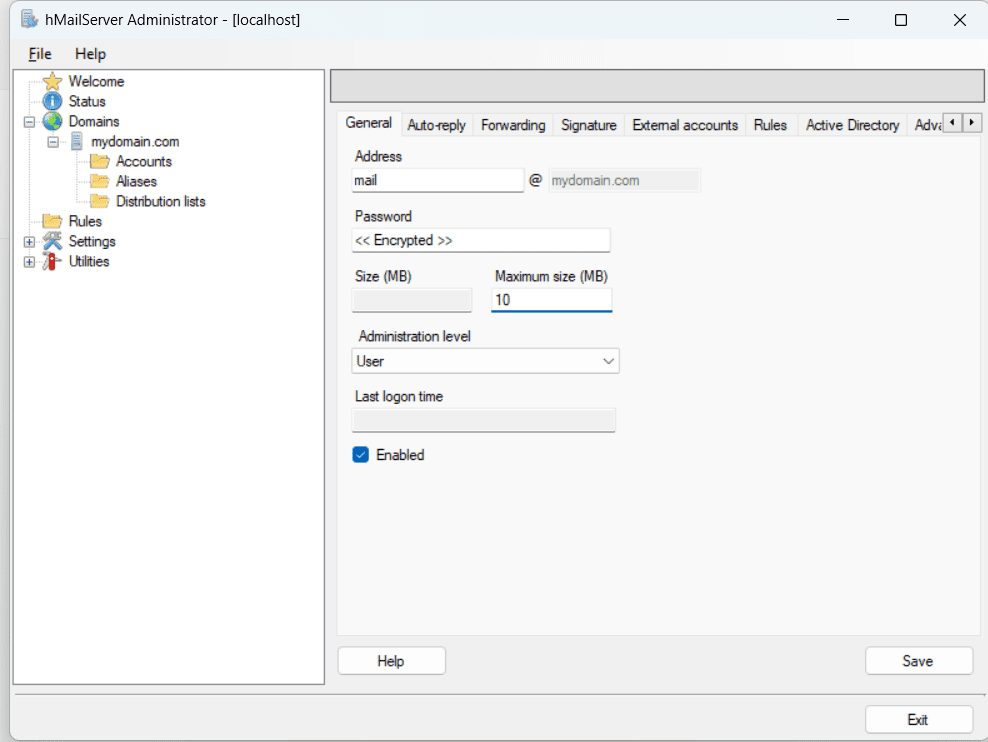
- Enter a suitable password in the Password section and save it.
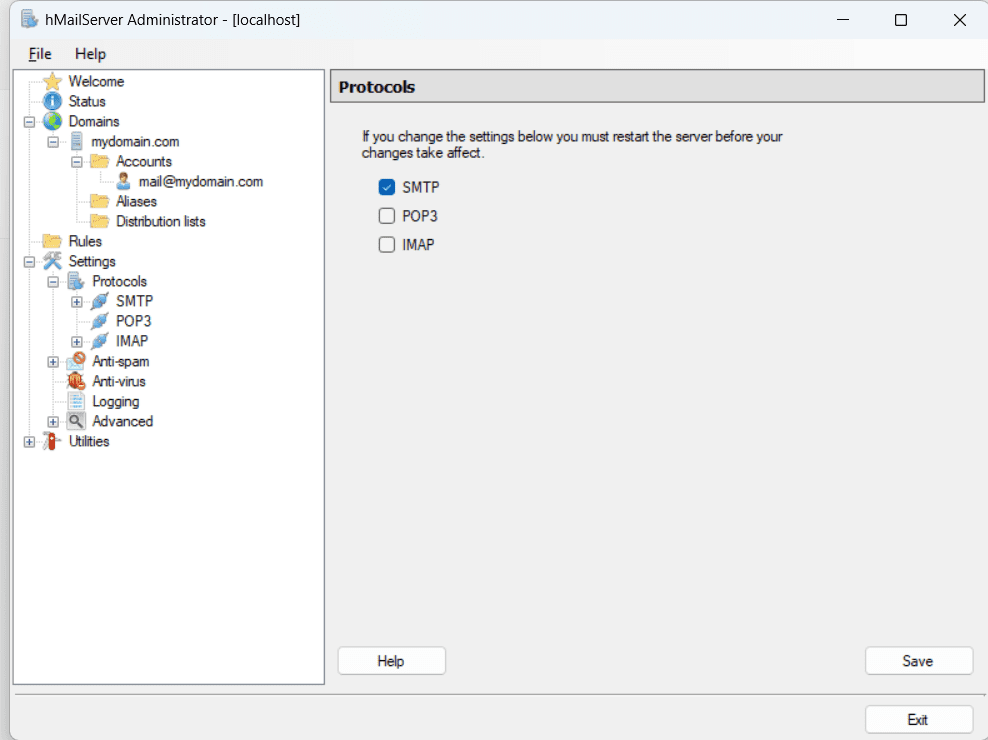
It is also necessary to configure protocols and ports for the mail server:
- Go to Settings - Protocols: check the SMTP box, uncheck POP3 and IMAP, and save these changes.
- After that, under the Settings heading, click on Advanced. In the Default Domain field, enter localhost and then save these settings. For additional settings, click the + sign.
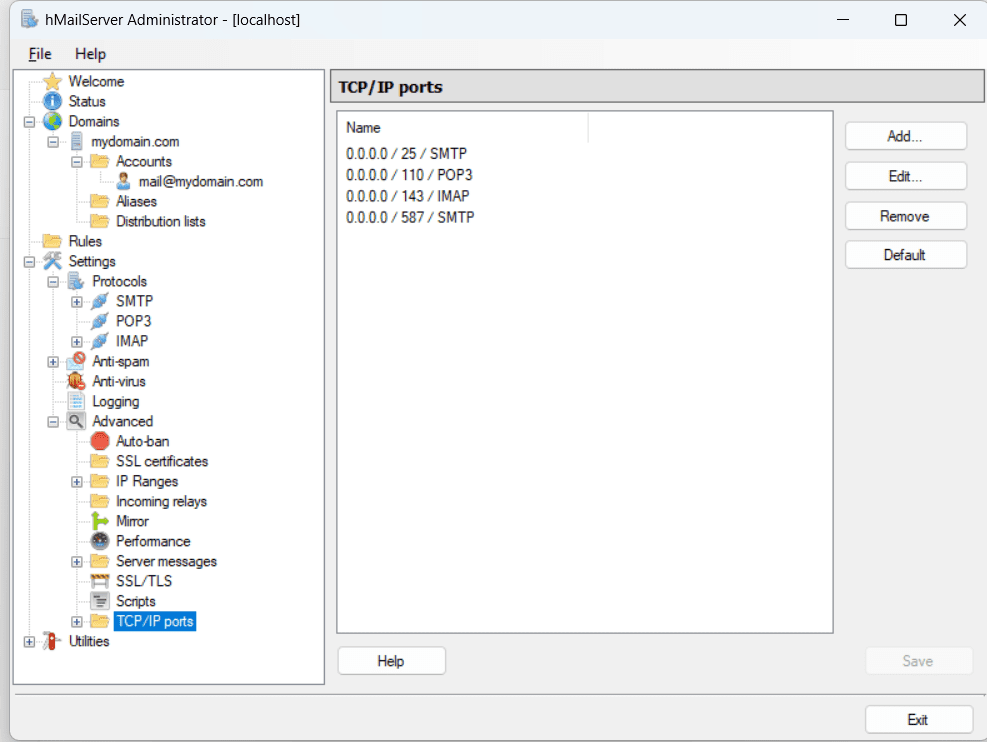
- Go to TCP/IP Ports and make sure that ports 25, 110, and 143 are enabled for SMTP, POP3, and IMAP.
To check the functionality of the mail server, go to Utilities - Diagnostics. Select the domain you created earlier and click Start.
Now the finishing touches: select and install a client (e.g. Thunderbird, Outlook, eM Client, etc.) to receive and send email. To log in, you will need the domain login and password used for the server.
Setting up your own email server via the command line
This method also requires a domain name and a server. To work with commands and access the server via SSH, owners of Linux and macOS devices can use the built-in terminal; owners of Windows - PuTTY program.
Let's start by configuring the DNS records. Log in to your domain registrar (or external DNS provider) and go to the DNS records of the domain you will use for the mail server.
- Set the nameservers of mydomain.com to your domain registrar’s nameservers.
- Setup the mail.mydomain.com A record to the primary IP of the server.
- Set the MX record of mydomain.com to mail.mydomain.com.
It may take up to two days to update DNS records.
You can add your server IP address to the hosts file to manage the server. If port 25 on your server is blocked, contact the technical support of your hoster. Ask them to unblock this port and set the reverse DNS records of your server IP address to mail.mydomain.com (where mail is your mail address name and mydomain.com is the domain name).
Now you can start setting up the server with a few commands:
- Connecting to the server via SSH: ssh root@server-IP
- Updating system packages: apt-get update
- Installing curl and git: apt-get install curl git
- Downloading Docker: curl -sSL https://get.docker.com/ | CHANNEL=stable sh
- Downloading components of Docker: curl -L https://github.com/docker/compose/releases/download/$(curl -Ls https://www.servercow.de/docker-compose/latest.php)/docker-compose-$(uname -s)-$(uname -m) > /usr/local/bin/docker-compose
- Update Docker permissions: chmod +x /usr/local/bin/docker-compose
- umask equals 0022
- Go to the /opt directory: cd /opt
- Downloading Mailcow files: git clone https://github.com/mailcow/mailcow-dockerized
- Go to Mailcow directory: cd mailcow-dockerized
- Creating the configuration file: ./generate_config.sh
- Specify the host name of the mail server (for example, mail.mydomain.com)
- Uploading Images: docker-compose pull
- Start (the -d parameter will start mailcow : dockerized detached:): docker-compose up -d
Go to mail.mydomain.com with username admin and password moohoo. In the settings, change the password to a more secure one. Also, you can set up your own mail server in the Configuration section.
After filling in all the data for the original domain name (mydomain.com), save the changes. Under "Mailboxes", you can change user settings or create aliases. Later you will be able to add more domains beyond the mydomain.com.
Web-based mail with a user-friendly interface can be accessed at http://mail.mydomain.com/SOGo/. You can also use any mail client (e.g. Thunderbird, Outlook, eM Client, etc.).
Dedicated Server
Smooth operation, high performance and user-friendly setup - it's all there for you.
From $70.00/moData Storage
Store your backups or personal data in a safe place - is*hosting will take care of the protection.
More