
Your SaaS tracker knows which of your offers convert and which don't. So does whoever runs it. That's the tradeoff with hosted tracking: your campaign data lives on infrastructure you don't control, and you pay per click for the privilege. Keitaro is the self-hosted alternative. It has a flat annual license, runs on your own VPS, and your data stays yours.
This guide covers a real install on is*hosting's Medium plan running CentOS 9 x64.
What Is Keitaro?
Keitaro is purpose-built for performance marketing: affiliate campaigns, media buying, and any operation routing paid traffic across multiple sources and geos. A visitor hits your campaign URL, Keitaro logs the click with its full attribute set (geo, device, mobile operator, referrer, UTM parameters), applies your flow rules, and redirects to the right landing page or offer. Conversions return via S2S postback, and the tracker matches them to the originating click so you get accurate ROI figures broken down by source, sub-ID, offer, and device.
What separates Keitaro from generic analytics is the routing layer. Flows let you send traffic to different offers based on any combination of attributes: geo, ISP, device OS, time of day, and custom parameters from your traffic source. A mobile Android visitor in Germany sees a different offer than a desktop visitor in Canada, all under the same campaign URL. Bot filtering and cloaking tools run at the entry point before any click reaches your offer.
Two hard constraints to know before provisioning:
-
Keitaro requires CentOS 9 Stream or CentOS 10 Stream. Ubuntu and Debian are not supported. The installer checks the OS immediately on launch and exits if it doesn't match.
-
The tracker also does not run behind NAT, so your VPS needs a direct public IP.
Both are installer-enforced requirements.
Keitaro vs. SaaS Trackers: When Self-Hosting Makes Sense
SaaS trackers bill per click or per event. At low volume, that's fine; you're paying someone else to run the infrastructure. Past a few hundred thousand clicks a month, the math flips: a Keitaro license is flat no matter how much traffic you push, so once it's installed, the server is your only ongoing cost.
Then there's the data. Whoever operates your SaaS tracker can see what you see, including which offers convert and which don't. That's your edge sitting on hardware you don't own. Self-hosting takes it off the table.
Server placement is a third factor for anyone running multi-geo traffic. is*hosting has VPS nodes in 40+ locations worldwide. If your audience is in Brazil, you deploy in São Paulo. If you're running German campaigns, you pick a Frankfurt node. Redirect latency is measurable and affects landing page performance across the full campaign chain.
What You Need Before Setup
- A VPS running CentOS 9 Stream or CentOS 10 Stream (the only supported OS options)
- KVM virtualization (OpenVZ will not work)
- Root SSH access
- A clean server with no control panel installed
- At least 20 GB SSD storage (the installer uses ~8 GB on its own)
- A domain name (required for HTTPS campaign links and postback URLs)
- An active Keitaro license from keitaro.io
Server sizing by expected daily click volume:
|
Clicks per day |
RAM |
CPU |
is*hosting plan |
|
Under 100,000 |
4 GB |
2 CPU |
Medium VPS |
|
100,000 to 500,000 |
8 GB |
4 CPU |
Premium VPS |
|
500,000 to 1,000,000 |
16 GB |
4 CPU |
Elite VPS or higher |
If you plan to use the Admin API for automated cost updates or external integrations, pick the next tier up from where your click volume lands.
The is*hosting Medium plan (3 CPU / 4 GB RAM / 40 GB NVMe, from $21.24/mo on annual billing) is the correct starting point for Keitaro. The Start plan at 2 GB RAM sits below Keitaro's own stated 4 GB minimum. The installer will complete, but you'll hit memory pressure quickly under real traffic.
Every is*hosting plan includes a dedicated IPv4, which directly satisfies Keitaro's no-NAT requirement. Weekly VPS backups are included on all plans.
During provisioning, select CentOS 9 x64 from the OS menu; that is the exact label at checkout.
VPS
KVM VPS with a dedicated IPv4, NVMe storage, and CentOS 9 — everything Keitaro needs, in 40+ locations, so you can deploy close to your traffic.
How to Install Keitaro on a VPS
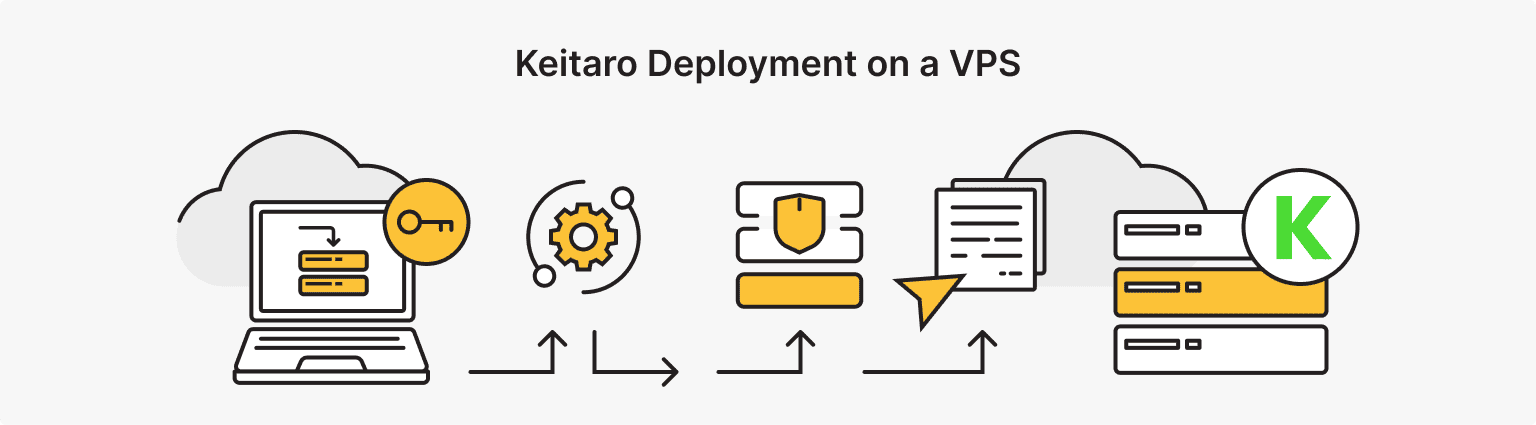
Step 1: Connect to Your Server
On Mac or Linux:
ssh root@YOUR_VPS_IPOn Windows, use PowerShell or PuTTY. Accept the fingerprint prompt, enter your root password, and you're at the shell when you see [root@server ~]#.
Step 2: Run the Installer
Keitaro installs via a single script. It handles everything: Podman containers, nginx, MariaDB, ClickHouse, Redis, certbot, and firewall configuration.
curl https://files.keitaro.io/scripts/releases/stable/kctl.sh | bash -s -- installThe script first downloads and bootstraps kctl (Keitaro's own CLI tool), then prints All assertions have passed once it confirms the OS and environment are valid. After that, it pulls container images for each component in parallel. On a fresh Medium VPS in Malaysia, the full process takes about 15 minutes.
One thing worth knowing: the installer uses Podman, not Docker. You don't need to install anything beforehand; the script handles Podman installation itself. You'll see Installing podman-docker in the output early in the process.
The installer also configures firewalld automatically, opening ports 22, 80, and 443. You don't need to run separate firewall commands. All other ports (MariaDB on 3306, Redis on 6379/6380, ClickHouse on 8123) are bound to 127.0.0.1 and not reachable externally.
When installation finishes, the terminal prints:
Keitaro 11.2.4 has been installed!
Please open the link in your browser of choice:
http://YOUR_VPS_IP/admin
Step 3: Verify Everything Is Running
Check that all services passed their health checks:
kctl checkA clean install returns:
Checking service clickhouse . OK
Checking service mariadb . OK
Checking service redis . OK
Checking service guest-redis . OK
Checking service system-redis . OK
Checking service kctld-server . OK
Checking service nats . OK
Checking service tracker-sandbox . OK
Checking service tracker-traffic . OK
Checking service tracker-admin . OK
Checking service nginx . OK
Everything is ok
To see what's running in detail:
kctl versionThis prints the full component stack with version numbers: Keitaro itself, kctl, ClickHouse, MariaDB, Redis, Nginx, and all tracker components.
Step 4: Open the Admin Panel and Configure
Navigate to http://YOUR_VPS_IP/admin in a browser. The server automatically redirects HTTP to HTTPS, so you'll land on the HTTPS version. On first load, Keitaro runs a two-step setup wizard.
Configure preferences. Enter your license key from keitaro.io, then set the system currency, default language, and timezone. Choose the currency carefully. You can change it later, but Keitaro will not convert historical click data when you do.
Create your admin user. Set a password and submit. You land on the dashboard.
Step 5: Add Your Domain
Keitaro uses parked domains for campaign links, admin access, and postback URLs.
At your domain registrar, add an A record pointing to your VPS IP and remove any other A, AAAA, or CNAME records on that domain. Keitaro requires a clean, dedicated domain. Using the same domain for the tracker and any other service is not supported.
DNS propagation typically takes a few minutes but can take up to an hour. Once it resolves, open the Domains tab in Keitaro, click Add, enter your domain, and click Create. Keitaro automatically requests an SSL certificate from Let's Encrypt. No manual certificate work is required.
After the domain shows OK status, set these three options in the domain configuration:
- Enable Admin Dashboard to restrict admin panel access to this specific domain only.
- Enable HTTPS-only to force all HTTP traffic to redirect to HTTPS.
- Set Crawlers to Disallowed to prevent search bots from indexing your campaign URLs.
Step 6: Lock Down Admin Access
Under Maintenance → Settings, restrict admin panel access by IP address so only your IP can reach /admin.
For temporary support access, use the built-in command rather than sharing root credentials:
kctl support-team-access allow
# Expires after 5 days. Revoke early with:
kctl support-team-access deny
To review who has accessed the panel:
tail -n 100 /var/log/nginx/keitaro-admin.access.logStep 7: Verify System Health
Before routing live traffic, check Maintenance → Status. Four readings matter:
- CPU Stolen. Any value above 0 means the hypervisor is withholding CPU time. Report it to is*hosting before proceeding.
- Free disk space. The install consumed ~8 GB on a 40 GB drive. The database grows with every click logged, so monitor this on high-volume setups.
- Data processing queue size. A persistently non-zero value means the server can't process clicks fast enough for the current volume. Size up.
- Cron timestamp. Updates every minute. If it goes stale, the tracker stops processing traffic entirely.
For external monitoring of the tracker endpoint itself, pair Keitaro with Uptime Kuma to get alerts when the admin panel stops responding, or campaign redirects time out.
How to Use Keitaro: Campaigns, Flows, and Reports
The Four Core Objects
Campaigns are the entry points. Each campaign gets a unique URL that you give to your ad network. A campaign without at least one flow attached does nothing; flows handle all routing.
Flows contain the routing logic: filters that define who qualifies, which landing pages they see first, and which offers they end up on. One campaign can hold multiple flows for different segments. For example, one flow handles mobile Android traffic in Germany, a second handles desktop traffic everywhere else, and a third catches anything that doesn't match the first two.
Landing pages are the pre-offer pages in your funnel. Keitaro supports local file uploads (zip archives), remote URLs, redirect pages, and preload pages. The built-in editor lets you modify locally uploaded pages without re-uploading the whole archive.
Offers are the final destinations: your affiliate links or direct sales pages. Conversions return via S2S postback and get attributed to the originating click.
Setting Up a Basic Campaign
- Go to Sources, click Create, and pick a traffic source template. Facebook, Google Ads, TikTok, and hundreds of other networks have pre-built templates that automatically map UTM parameters.
- Go to Affiliate Networks, click Create, and select your network template. This pre-fills the correct postback URL format for that network.
- Go to Campaigns, click Create, assign your domain and traffic source, then click Create Flow.
- In the flow schema, add your landing page and offer.
- Copy the Campaign URL and paste it as the destination URL in your ad account.
Reports
Keitaro's reporting runs on ClickHouse on Advanced plans and above. According to Keitaro's own benchmarks, ClickHouse generates reports up to 14 times faster than the legacy MySQL engine.
The Create Report section lets you build custom segments from any combination of metrics: geo, device, traffic source, sub-ID, offer, and conversion status. The Click Log shows row-level data for each individual click, with its full attribute set.
How to Update Keitaro
Keitaro shows an update notification in the admin panel when a new version is available. Through the UI: Maintenance → Update Keitaro, select the stable channel, click Yes, then click Install. The process runs in the background and takes roughly 15 minutes.
To update from the terminal:
kctl updateA completed update prints:
Keitaro X.X.X has been installed!Back up before every update. Use Maintenance → Archive to export a tracker backup and download it to a separate machine. Keeping the only copy on the same server means a failed update leaves you with nothing to restore from.
is*hosting includes free weekly VPS backups on all plans, but a full-server snapshot should be a last resort. A targeted Keitaro archive is faster to restore and uses less storage.
Backup Storage
Free weekly VPS backups on every plan — so a failed Keitaro update or a bad night never means losing your click data.
What You've Got Running
Keitaro installs in about 15 minutes on a CentOS 9 x64 VPS with a direct public IP. After completing the steps above, you have a tracker with unlimited campaigns, full click-level data stored on your own server, S2S postback integration with hundreds of affiliate networks, and ClickHouse-backed reporting running on 3 CPU / 4 GB RAM.
Firewall rules, SSL, and container networking are all handled by the installer. There's nothing left to configure manually before taking live traffic.
The is*hosting Medium plan (3 CPU / 4 GB RAM / 40 GB NVMe, from $21.24/mo annually) covers operations fewer than 100,000 daily clicks. For teams scaling above that, the Premium plan handles up to 500,000 clicks per day. Select CentOS 9 x64 at checkout. If you're running n8n alongside Keitaro for workflow automation or automated cost updates, is*hosting's n8n VPS runs cleanly on the same infrastructure.
VPS in 40+ locations
Order VPS in different regions and manage them from a single account.
From $5.94/mo