
Watching your own movie and TV library away from home shouldn't cost a recurring fee, but that's exactly where Plex has pushed things: a Plex Pass or a separate Remote Watch Pass just to stream files you already own, from a server you already run. Jellyfin does the same job with none of that. This guide installs Jellyfin on an is*hosting Premium VPS, from a clean Ubuntu 24.04 image to a working server with a media library and remote access enabled.
Before You Provision
- An is*hosting VPS with root SSH access (included on every plan)
- Docker (not pre-installed; installed further down)
- Your media files, either already on the VPS or reachable through a mounted volume
- About 15 minutes for the install itself
Transcoding load scales with CPU cores, not RAM, so size the plan by how many people stream at once, not by library size:
|
Use case |
CPU cores |
RAM |
is*hosting plan |
|
Solo viewer, mostly direct play |
3 |
4 GB |
Medium |
|
Small household, regular software transcoding |
4 |
8 GB |
Premium |
|
Shared server, several concurrent transcodes |
6 |
16 GB |
Elite |
This guide uses Premium ($31.99/mo): 4 CPU cores, 8 GB RAM, 50 GB SSD. See the full lineup on the VPS product page. Every plan includes a dedicated IPv4 by default, which Jellyfin needs to be reachable on the internet, plus a weekly VPS backup that sits underneath the update workflow covered later. If your library outgrows the base 50 GB, is*hosting's SSD and NVMe add-ons scale from 25 GB to 300 GB without a full plan upgrade.
VPS
Root access, a dedicated IPv4 and weekly backups on every plan. Everything Jellyfin needs to stream your library from anywhere.
Setting Up the Server
Step 1: Provision the VPS
At checkout, select Ubuntu, then version v. 24 (Ubuntu 24.04). See the FAQ below for why this guide uses Docker rather than Jellyfin's native installer.
Step 2: Install Docker
Docker isn't pre-installed on is*hosting VPS plans:
curl -fsSL https://get.docker.com | sh
systemctl enable --now docker
Step 3: Set Up the Jellyfin Container
mkdir -p /root/jellyfin/config /root/jellyfin/cache /root/jellyfin/media
cat > /root/jellyfin/docker-compose.yml << 'EOF'
services:
  jellyfin:
    image: jellyfin/jellyfin:latest
    container_name: jellyfin
    restart: unless-stopped
    ports:
      - 8096:8096/tcp
      - 7359:7359/udp
    volumes:
      - /root/jellyfin/config:/config
      - /root/jellyfin/cache:/cache
      - type: bind
        source: /root/jellyfin/media
        target: /media
    environment:
      - JELLYFIN_PublishedServerUrl=http://<your-vps-ip>
EOF
This mirrors Jellyfin's own published compose example: 8096/tcp for the web interface, 7359/udp for local client auto-discovery, and separate /config and /cache volumes so recreating the container never touches your metadata. Pull with the quiet flag to avoid a bloated log, then start it:
cd /root/jellyfin
docker compose pull -q
docker compose up -d
Check the startup log for the line that confirms the web server actually bound its port:
docker compose logs jellyfin | grep KestrelConfirmed on a real Premium-tier install (Ubuntu 24.04.4 LTS, hostname a260984899.local, the alphanumeric-plus-.local is*hosting pattern, not an EC2-style ip-172-31-x-x string), a healthy start logs:
jellyfin | [17:38:00] [INF] [7] Main: Kestrel is listening on 0.0.0.0docker ps confirms the rest:
CONTAINER ID   IMAGE                      STATUS                            PORTS                                            NAMES
b47a4a8395d2   jellyfin/jellyfin:latest   Up 10 seconds (health: starting)  0.0.0.0:8096->8096/tcp, 0.0.0.0:7359->7359/udp   jellyfin
(IPv6 equivalents for both ports show up alongside these.) Give it a few more seconds; "health: starting" flips to healthy shortly after. From a cold pull, the whole sequence, Docker engine install through the container reporting Up, took 74 seconds on this run.
Step 4: Firewall
ufw status comes back inactive on a fresh is*hosting Ubuntu VPS, and it wouldn't change anything either way: Docker publishes container ports by writing its own rules ahead of ufw's INPUT chain. Confirmed live with ss -tlnp: 0.0.0.0:8096 is owned by docker-proxy, not a process ufw would ever filter, so the port is reachable from the internet the moment the container starts.
Running ufw allow 8096/tcp changes nothing here; it's already open. If you later want to restrict Jellyfin to specific IPs, that has to go in the DOCKER-USER iptables chain instead, since a plain ufw rule won't touch a Docker-published port.
7359/udp is worth leaving alone on a public-facing VPS. It only answers local network discovery broadcasts, and there's no local subnet full of Jellyfin clients on the open internet for it to serve.
Step 5: Run the Setup Wizard
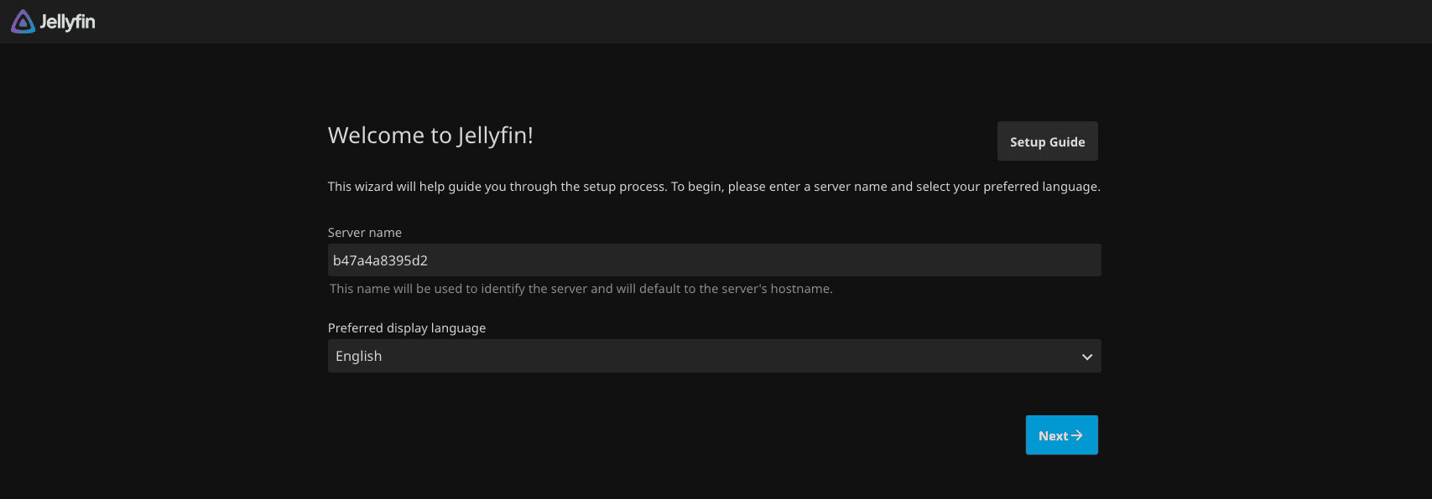
Visit http://<your-vps-ip>:8096 in a browser. The wizard runs through six screens, confirmed by name on this install: "Welcome to Jellyfin!", "Tell us about yourself", "Set up your media libraries", "Preferred Metadata Language", "Set up Remote Access" and "You're Done!"
One default worth catching on the first screen: since the compose file above never sets an explicit container hostname, Docker assigns one from the container ID, and the wizard's "Server name" field defaults to it, something like b47a4a8395d2 rather than anything recognizable. It's harmless, but rename it to something sane here, since this is the name every client app will display.
On "Set up your media libraries," add a library pointing at /media:
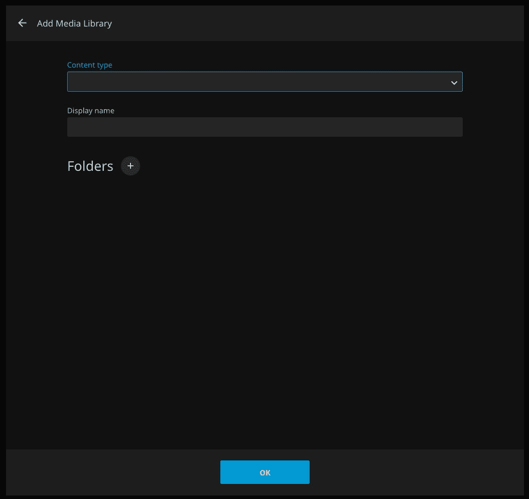
It's fine to click Next without adding one here too if you haven't uploaded media yet; adding a library after the fact is covered next.
On "Set up Remote Access," the only control on this build is a single checkbox: "Allow remote connections to this server," with the note "If unchecked, all remote connections will be blocked." Leave it checked.
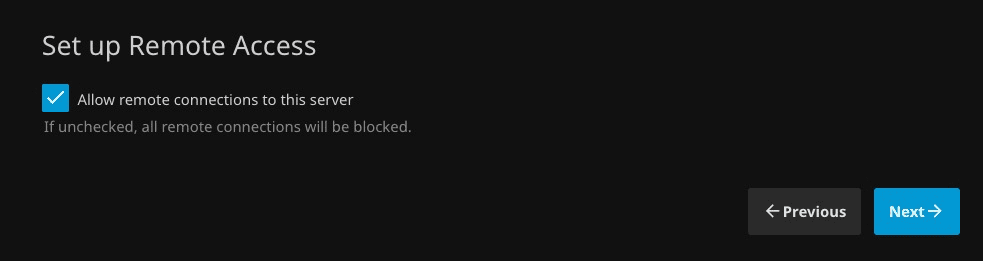
This build's wizard has no separate UPnP toggle; check Dashboard → Networking after setup if that matters to you.
Clicking Finish doesn't drop you straight into the dashboard. It redirects to a login screen; sign in with the admin username and password from the "Tell us about yourself" step.
Running It Day to Day
Adding a library after setup. If you skip the library step in the wizard, which is normal if you haven't uploaded media yet, first login lands here:
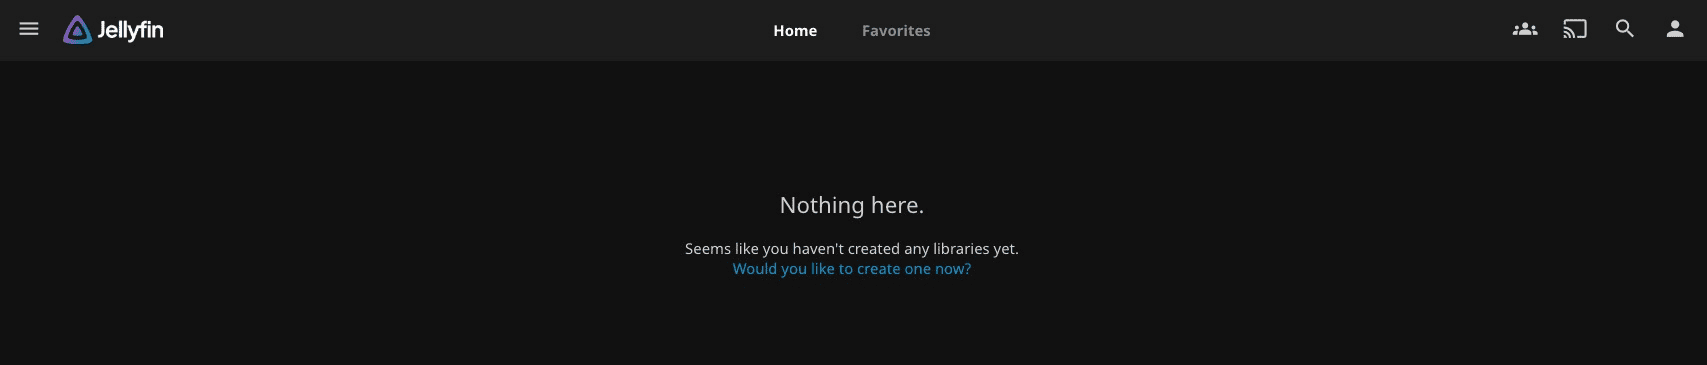
Click "Would you like to create one now?", or go to Dashboard → Libraries → Add Media Library anytime. Each library gets its own content type (movies, shows, music) and its own folder inside /media.
Inviting other viewers. Create accounts under Dashboard → Users. Each user has an individual "Allow remote connections to this server" toggle, so you can grant or withhold off-network access per person instead of server-wide.
Transcoding settings. These live under Dashboard → Playback. Since this VPS has no GPU, leave hardware acceleration off; Jellyfin falls back to software transcoding with the bundled jellyfin-ffmpeg build automatically whenever a client requests something it can't direct-play.
Keeping It Updated
Take a built-in backup first, from Dashboard → Backups → Create Backup. It writes a zip archive to /root/jellyfin/config/data/backups, Jellyfin's default backup path for the official Docker image, and covers the database plus whatever else you select (metadata, subtitles, Trickplay data). is*hosting's weekly VPS backup covers the whole server as a safety net, but restoring from the built-in backup is faster when only Jellyfin needs to roll back, and it's mandatory in practice: Jellyfin has no downgrade path once a new version starts and applies its database migrations.
Then update the container:
cd /root/jellyfin
docker compose pull -q
docker compose up -d
Common Questions

What You've Got Running
This is a Jellyfin server on an is*hosting Premium VPS: 4 CPU cores, 8 GB RAM, 50 GB SSD, $31.99/mo, running version 10.11.11. The Dashboard sidebar prints that version under the server name on every page, so there's nothing to hunt for. It's current stable as of this writing, though Jellyfin ships point releases often enough that it's worth checking your own installed version there. The full sequence, Docker engine install through the container reporting Up, ran in 74 seconds on a cold pull, and used 2.5 GB of the 50 GB SSD (4.9 GB to 7.4 GB), leaving 40 GB free for the actual media library. It serves your media library over a dedicated IPv4 with remote access enabled, no account created with a third party, no recurring pass to unlock streaming away from home, and no hardware-transcoding paywall to hit later.
For general server hardening before you get this far, how to set up a Linux VPS covers the basics, and Uptime Kuma on a VPS is worth pairing with this install if you want an alert the moment the stream goes down.